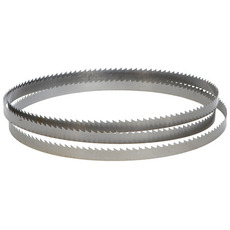
Bandsaw Blade Troubleshooting Guide

Bandsaw Blade Troubleshooting Guide

How to identify and solve the most common problems with bandsaw blades.

Having troubles with your bandsaw blades can be frustrating and costly. By identifying specificaly what the issue you are having is, and working through these suggestions, you will be able to quickly resolve most, if not all issues. If after going through this guide you are still having troubles, please feel free to give us a call at 1-888-665-6936 or click on the “Chat with us here” for further assistance.

The following information comes from one of the best bandsaw blade manufacturers in the USA – M.K. Morse


Problem Problem Cause Solutions
Premature Blade Breakage - Straight Break Indicates Fatigue
  1. Incorrect blade – teeth too coarse
  2. Blade tension too high
  3. Side guides too tight
  4. Damaged or misadjusted blade guides
  5. Excessive feed
  6. Incorrect cutting fluid
  7. Wheel diameter too small for blade
  8. Blade rubbing on wheel flanges
  9. Teeth in contact with work before starting saw
  10. Incorrect blade speed
  1. Use finer tooth pitch
  2. Reduce blade tension
  3. Check side guide clearance
  4. Check all guides for alignment/damage
  5. Reduce feed pressure
  6. Check coolant
  7. Use thinner guage blade
  8. Adjust wheel alignment
  9. Allow 1/2” clearance before starting cut
  10. Increase or decrease blade speed
Premature dulling of teeth
  1. Teeth pointing in wrong direction / blademounted backwards
  2. Improper or no blade break-in
  3. Hard spots in material
  4. Material work hardened
  5. Improper coolant
  6. Improper coolant concentration
  7. Speed too high
  8. Feed too light
  9. Teeth too small
  1. Install blade correctly. If teeth are facing the wrong direction, flip blade inside out
  2. Break in blade properly
  3. Check for hardness or hard spots like
    scale or flame cut areas
  4. Increase feed pressure
  5. Check coolant type
  6. Check coolant mixture
  7. Check recommended blade speed
  8. Increase feed pressure
  9. Increase tooth size
Innacurate Cut
  1. Tooth set damage
  2. Excessive feed pressure
  3. Improper tooth size
  4. Cutting fluid not applied evenly
  5. Guides worn or loose
  6. Insufficient blade tension
  1. Check for worn set on one side of blade
  2. Reduce feed pressure
  3. Check tooth size chart
  4. Check coolant nozzles
  5. Tighten or replace guides, check for proper alignment
  6. Adjust to recommended tension
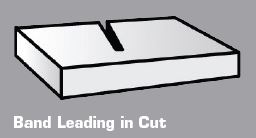
Band leading in the cut
  1. Over-feed
  2. Pushed material too hard, too fast
  3. Insufficient blade tension
  4. Tooth set damage
  5. Guide arms loose or set too far apart
  6. Chips not being cleaned from gullets
  7. Teeth too small
  1. Reduce feed force
  2. Lower feed pressure
  3. Adjust recommended tension
  4. Check material for hard inclusions
  5. Position arms as close to work as possible. Tighten arms.
  6. Check chip brush
  7. Increase tooth size

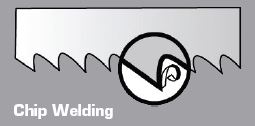
Chip Welding

  1. Insufficient coolant flow
  2. Wrong coolant concentration
  3. Excessive speed and/or pressure
  4. Tooth size too small
  5. Chip brush not working
  1. Check coolant level and flow
  2. Check coolant ratio
  3. Reduce speed and/or pressure
  4. Use coarser tooth pitch
  5. Repair or replace chip brush
Teeth Fracture - Back of tooth indicates work spinning in clamps
  1. Incorrect speed and/or feed
  2. Incorrect blade pitch
  3. Saw guides not adjusted properly
  4. Chip brush not working
  5. Work spinning or moving in vise
  1. Check cutting chart
  2. Check tooth size chart 
  3. Adjust or replace saw guides
  4. Repair or replace chip brush
  5. Check bundle configuration/adjust vise pressure
Irregular Break - Indicates material movement
  1. Indexing out of sequence
  2. Material loose in vise
  1. Check proper machine movement
  2. Check vise or clamp
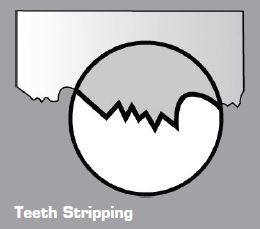
Teeth Stripping
  1. Feed pressure too high
  2. Tooth stuck in cut
  3. Improper or insufficient coolant
  4. Incorrect tooth size
  5. Hard spots in material
  6. Work spinning in vise - loose nest or bundle
  7. Blade speed too slow
  8. Blade teeth running backwards
  9. Chip brush not working
  1. Reduce feed pressure
  2. Do not enter old cut with a new blade
  3. Check coolant flow and concentration
  4. Check tooth size chart 
  5. Check material for hard inclusions
  6. Check clamping pressure - be sure work is held firmly
  7. Increase blade speed - see cutting chart
  8. Reverse blade (turn inside out)
  9. Repair or replace chip brush
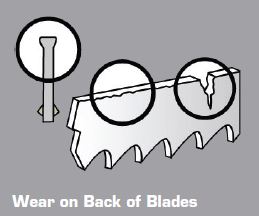
Wear on the back of the blade
  1. Excessive feed pressure
  2. Insufficient blade tension
  3. Back-up guide roll frozen, damaged, or worn
  4. Blade rubbing on wheel flange
  1. Decrease feed pressure
  2. Increase blade tension and readjust guides
  3. Repair or replace back-up roll or guide
  4. Adjust wheel cant
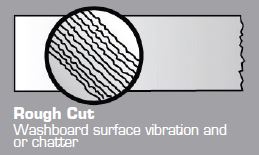
Rough Cut - Washboard surface vibration and/or chatter
  1. Dull or damaged blade
  2. Incorrect speed or feed
  3. Insufficient blade support
  4. Incorrect tooth pitch
  5. Insufficient coolant
  1. Replace with new blade
  2. Increase speed or decrease feed
  3. Move guide arms as close as possible to the work
  4. Use finer pitch blade
  5. Check coolant flow
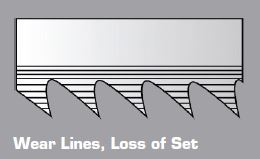
Wear lines - Loss of set
  1. Saw guide inserts or wheel flange are riding on teeth
  2. Insufficient blade tension
  3. Hard spots in material
  4. Back-up guide worn
  1. Check machine manual for correct blade width
  2. Tension blade properly
  3. Check material for inclusions
  4. Replace guide
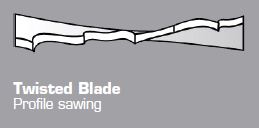
Twisted blade - Profile sawing
  1. Blade binding in cut
  2. Side guides too tight
  3. Radius too small for blade width
  4. Work not firmly held
  5. Erratic coolant flow
  6. Excessive blade tension
  1. Decrease feed pressure
  2. Adjust side guide gap
  3. Use narrower blade
  4. Check clamping pressure
  5. Check coolant nozzles
  6. Decrease blade tension
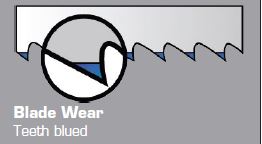
Blade wear - Teeth blued
  1. Incorrect blade
  2. Incorrect feed or speed
  3. Improper or insufficient coolant
  4. "Blueing" caused by excessive heat
  1. Use coarser tooth pitch
  2. Increase feed or decrease speed
  3. Check coolant flow
  4. Use above suggestions to decrease heat


If you are still having issues after going through this guide, please feel free to reach out to us for further support!

1-888-665-6936

Robert McDonald Posted by Robert McDonald

Products related to this article

Related Articles

How to Choose the Best Band Saw Blade
Band saw blades from Online Supply are custom made to your specific requirements, so you can get the best possible blade for your particular application. If you already know what you need, then head on over to our Custom Welded Bandsaws page and fill out the custom blade form. If you are not sure, then keep reading and we will help you figure out what would work best for you! Note on 3 Wheel Bandsaws and Bench Top “Hobby” Saws  –  These hobby saws typically have wheels that are 10” or less in diameter and require a special thin guage, flexible bandsaw blade. We do not recommend ordering..
Skookum Tools Ltd. © 2024